The PowerShell Gallery is Down Again... Now What?

The Problem
We’ve all been there. You’re getting ready to perform some work that requires installing a PowerShell module on some servers. Or, your Production pipelines are suddenly full of red X’s even though you’ve tested your code extensively. You test it in your own PowerShell prompt locally, and are greeted with the following message:
"Powershell gallery is currently unavailable... please try again later"
You open up a tab to browse to the PowerShell Gallery page, and another tab to check Twitter to see if others are experiencing the same issue:
Unfortunately, the PowerShell Gallery is currently experiencing an outage... we are currently working to resolve this as soon as possible and will provide updates as available...thanks
— Sydney Smith (@sydneysmithreal) June 14, 2022
Yup. That was me too, just a few weeks ago. 😱😱😱😱
The PowerShell Gallery we know and love can sometimes fail you in the most inopportune moments. Your mission-critical code needs the ability to withstand outages like this, while still ensuring you are still pulling down the latest versions of modules.
Of course, we acknowledge and appreciate The PowerShell Team, who work tirelessly to keep the PowerShell Gallery up, and the site abides by a Microsoft [Terms of Use] that is very clear about no guaranteed uptime.
A Solution?
However, what if we could find a way to protect ourselves from outages like this with a more highly-available option, without introducing too much complexity? Well my friends, we may have just the thing for you here at Cloudsmith! 😉
In this article, I’ll break down the following steps in this process for you:
- Create a NuGet Repository (aka repo) on Cloudsmith
- Configure this repo in your PowerShell console
- Use Save-Module to pull down a few PowerShell modules
- Push these modules up to your Cloudsmith repo
- Install these modules locally from your Cloudsmith repo
PowerShell code examples will be provided for your convenience.
As a bonus step, I’ll introduce you to Cloudsmith Upstreams. Upstreams may as well be “The Easy Button” for setting up a PowerShell Gallery backup repository, as they remove the need for you to pull packages from the PowerShell Gallery and push them up to your Cloudsmith repo.
Sound good? Let’s get started.
How to create a NuGet repository on Cloudsmith
I’ll outline the process for setting up a NuGet repo on Cloudsmith here, but believe me when I tell you this can take as little as 60 seconds! Don’t believe me? Are you a visual learner? Check out this video where I show you.
Let’s break down the steps here.
Signup for a free Cloudsmith trial
Click the signup link and accept your email invite.
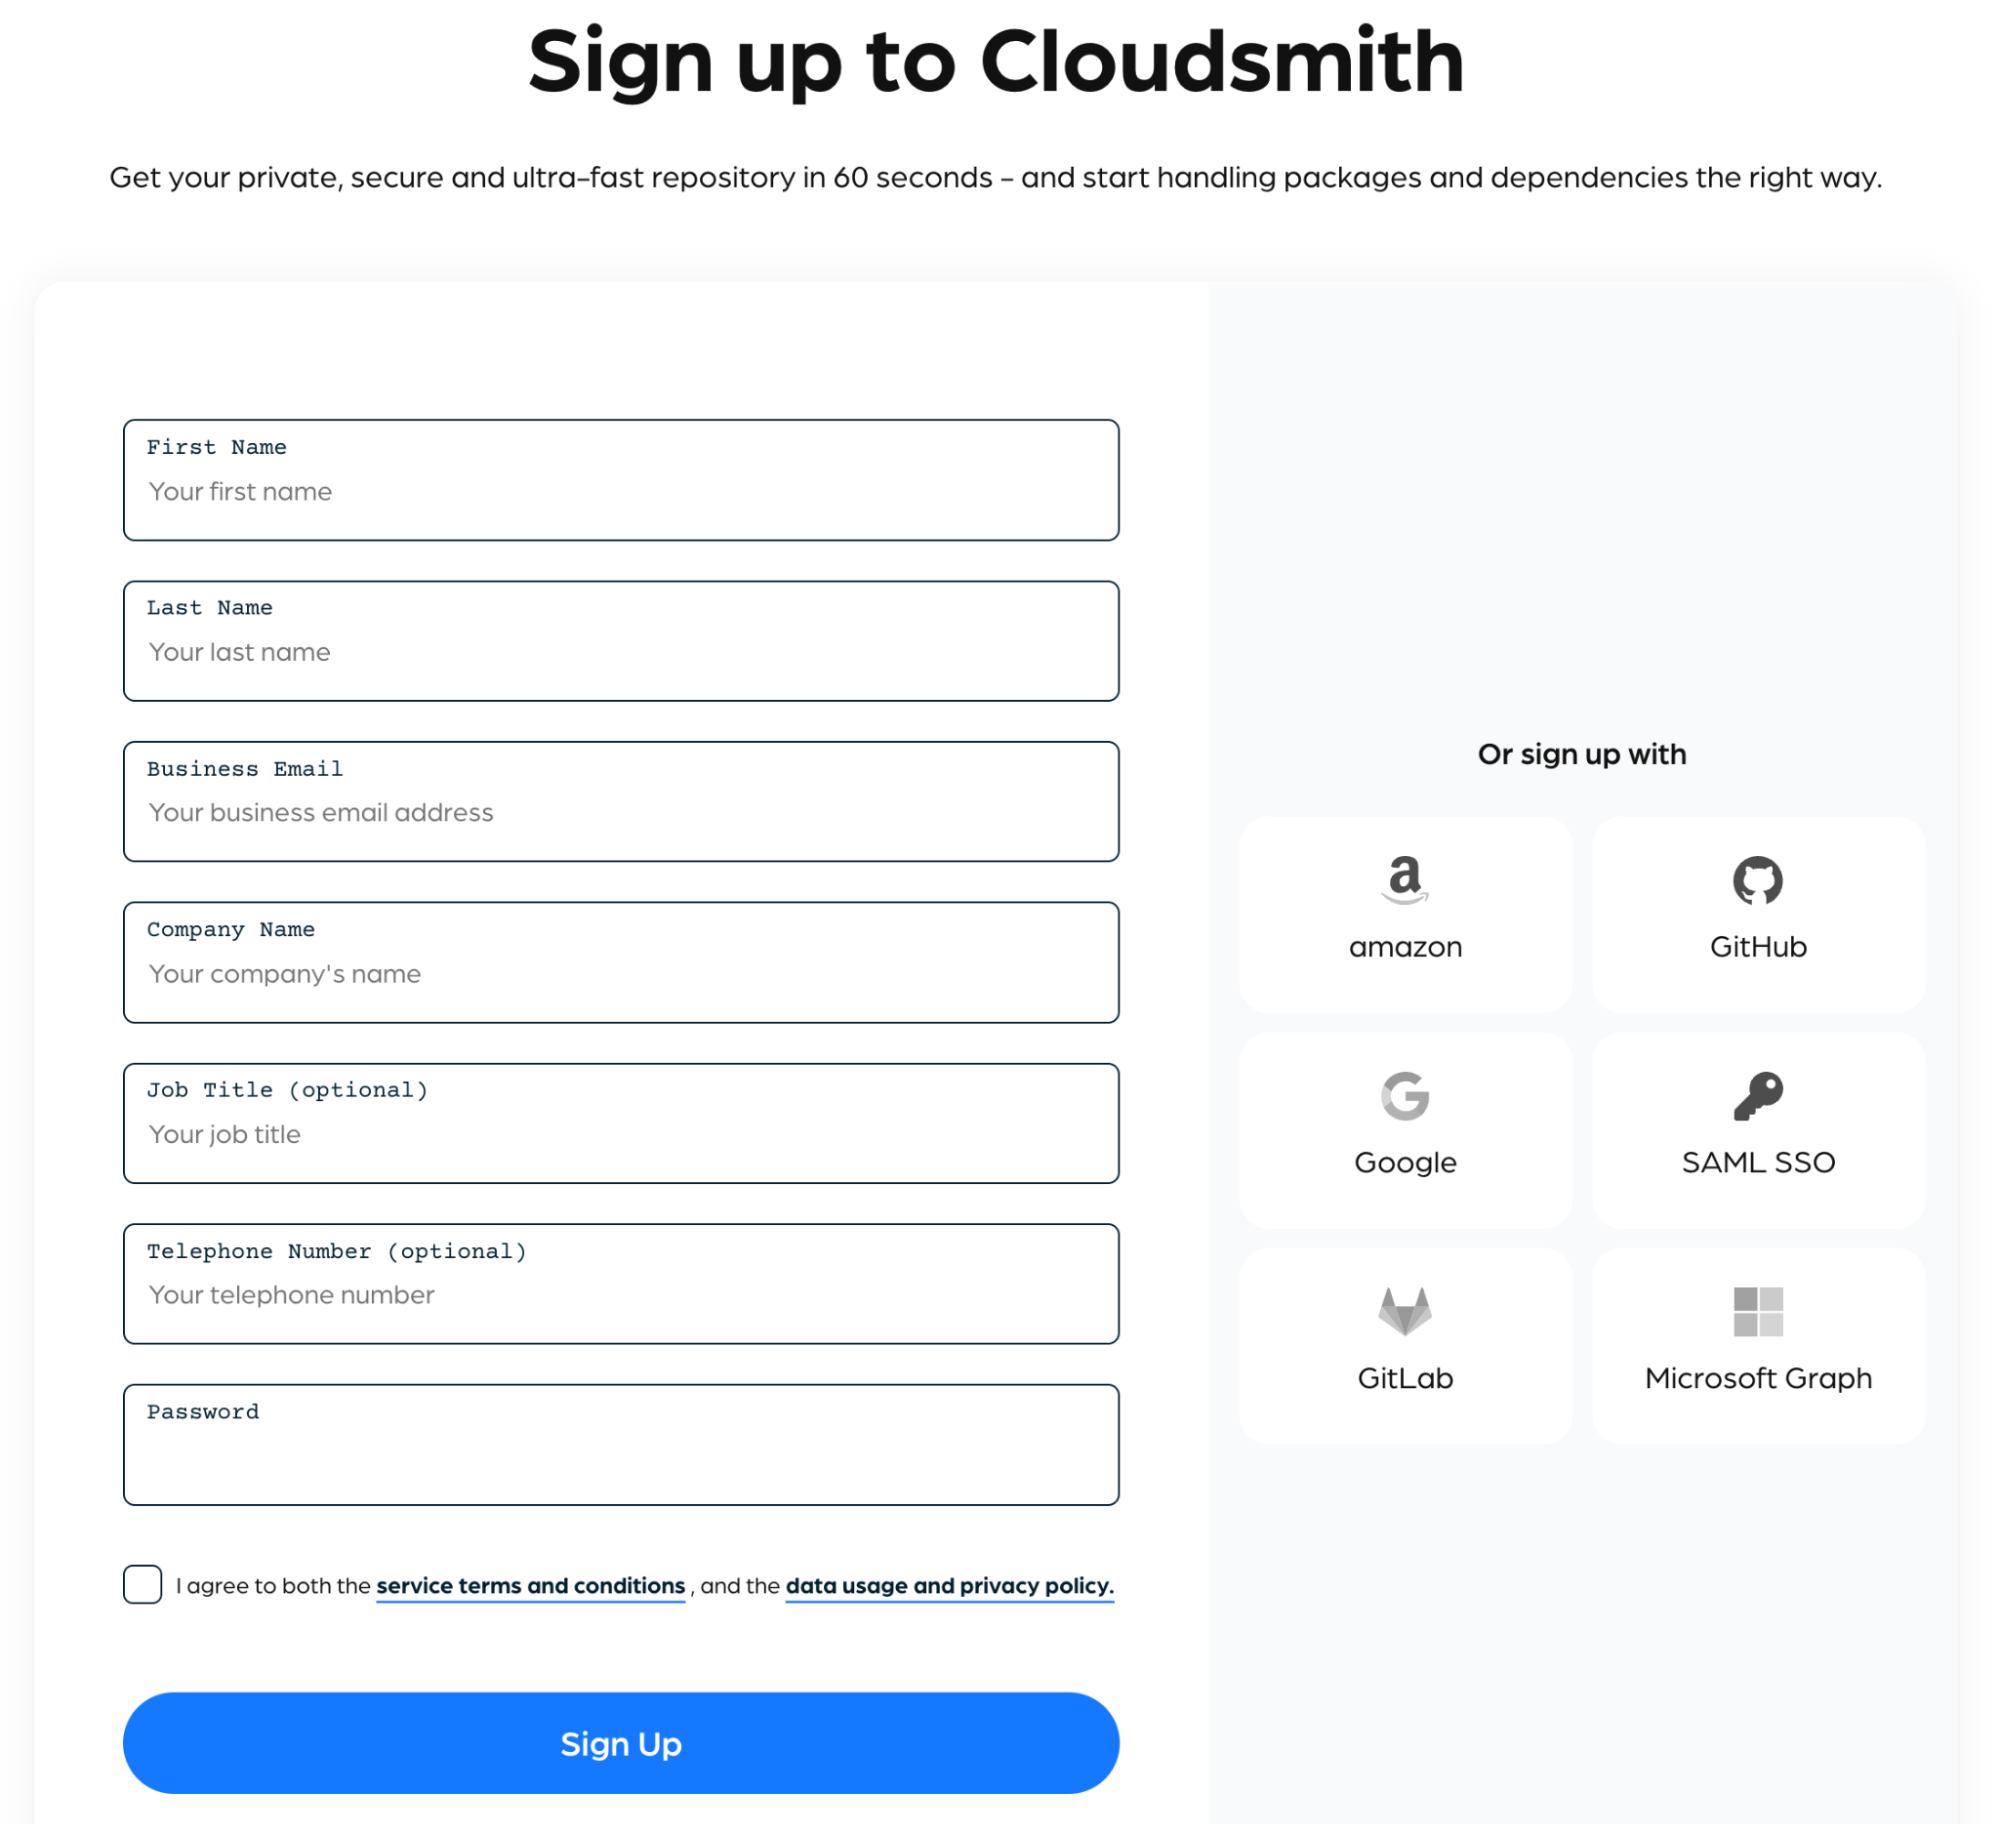
Sign up for a trial account on Cloudsmith. It only takes a few seconds, and you’ll receive an email invite that you can then accept.
If you want to keep it even simpler, you can just use one of the Social Sign-On links to the right. For example, since I’m already logged into my Gmail account, I can simply click the “Google” sing-on link, and accept the use of my Google account for authentication.
Create your Organization

You’ll now see the message above when logged in. Click the green “Create New Organization” button and fill out the fields to create your organization.
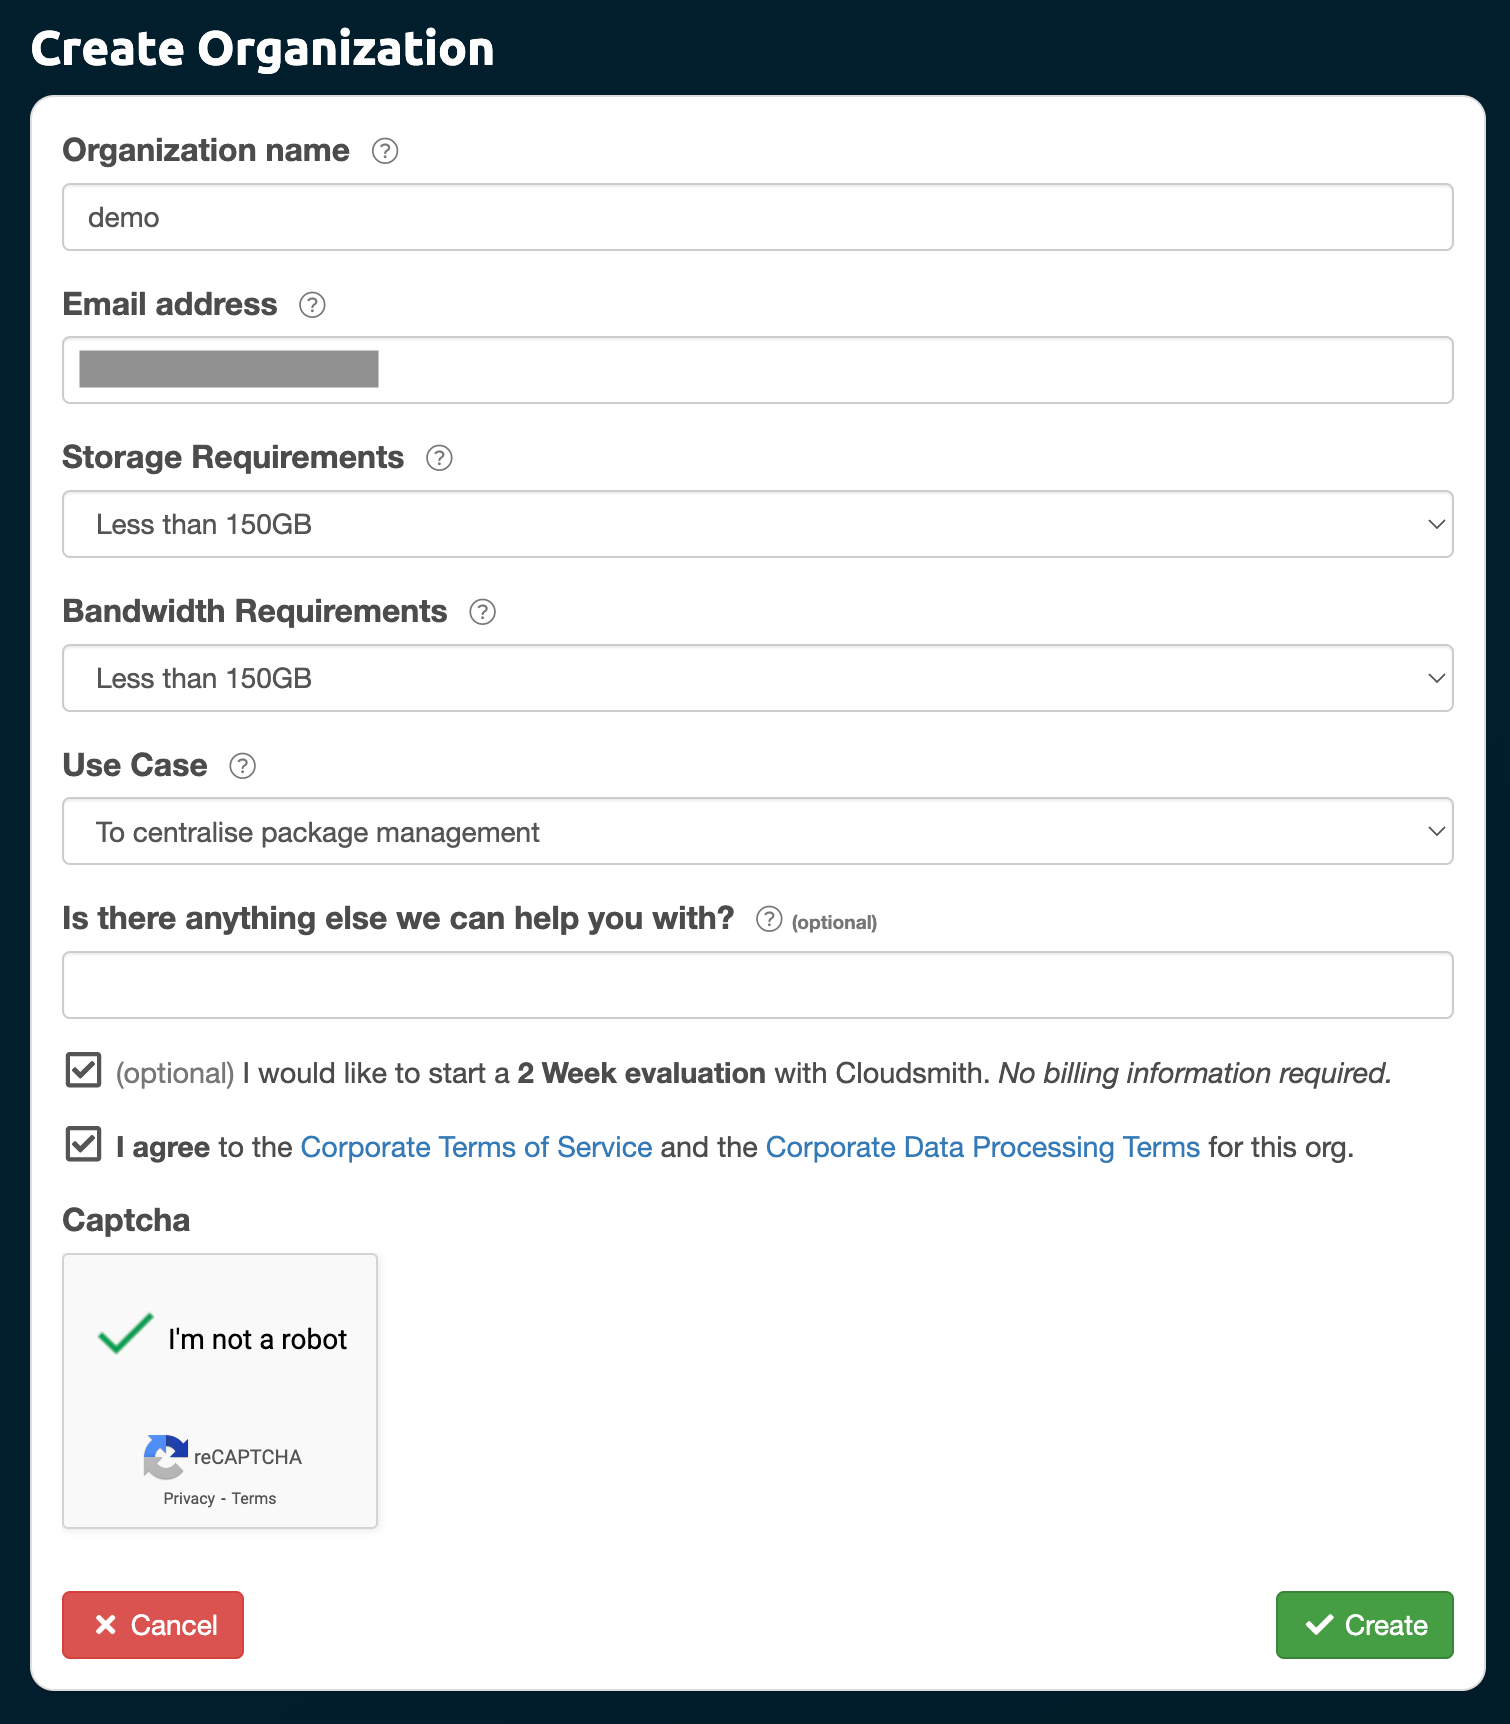
Click the “Create” button, and in a few seconds, your organization should be ready to use.
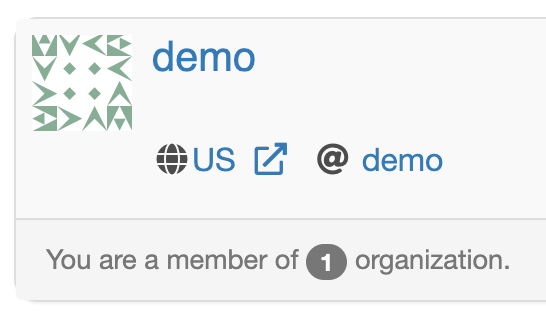
Create your Repository
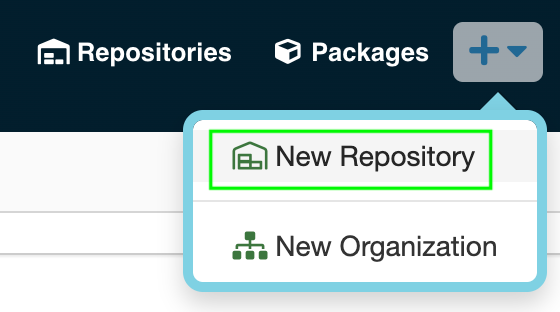
Click on the plus icon (+) at the top right corner of your screen, and select “New Repository”.
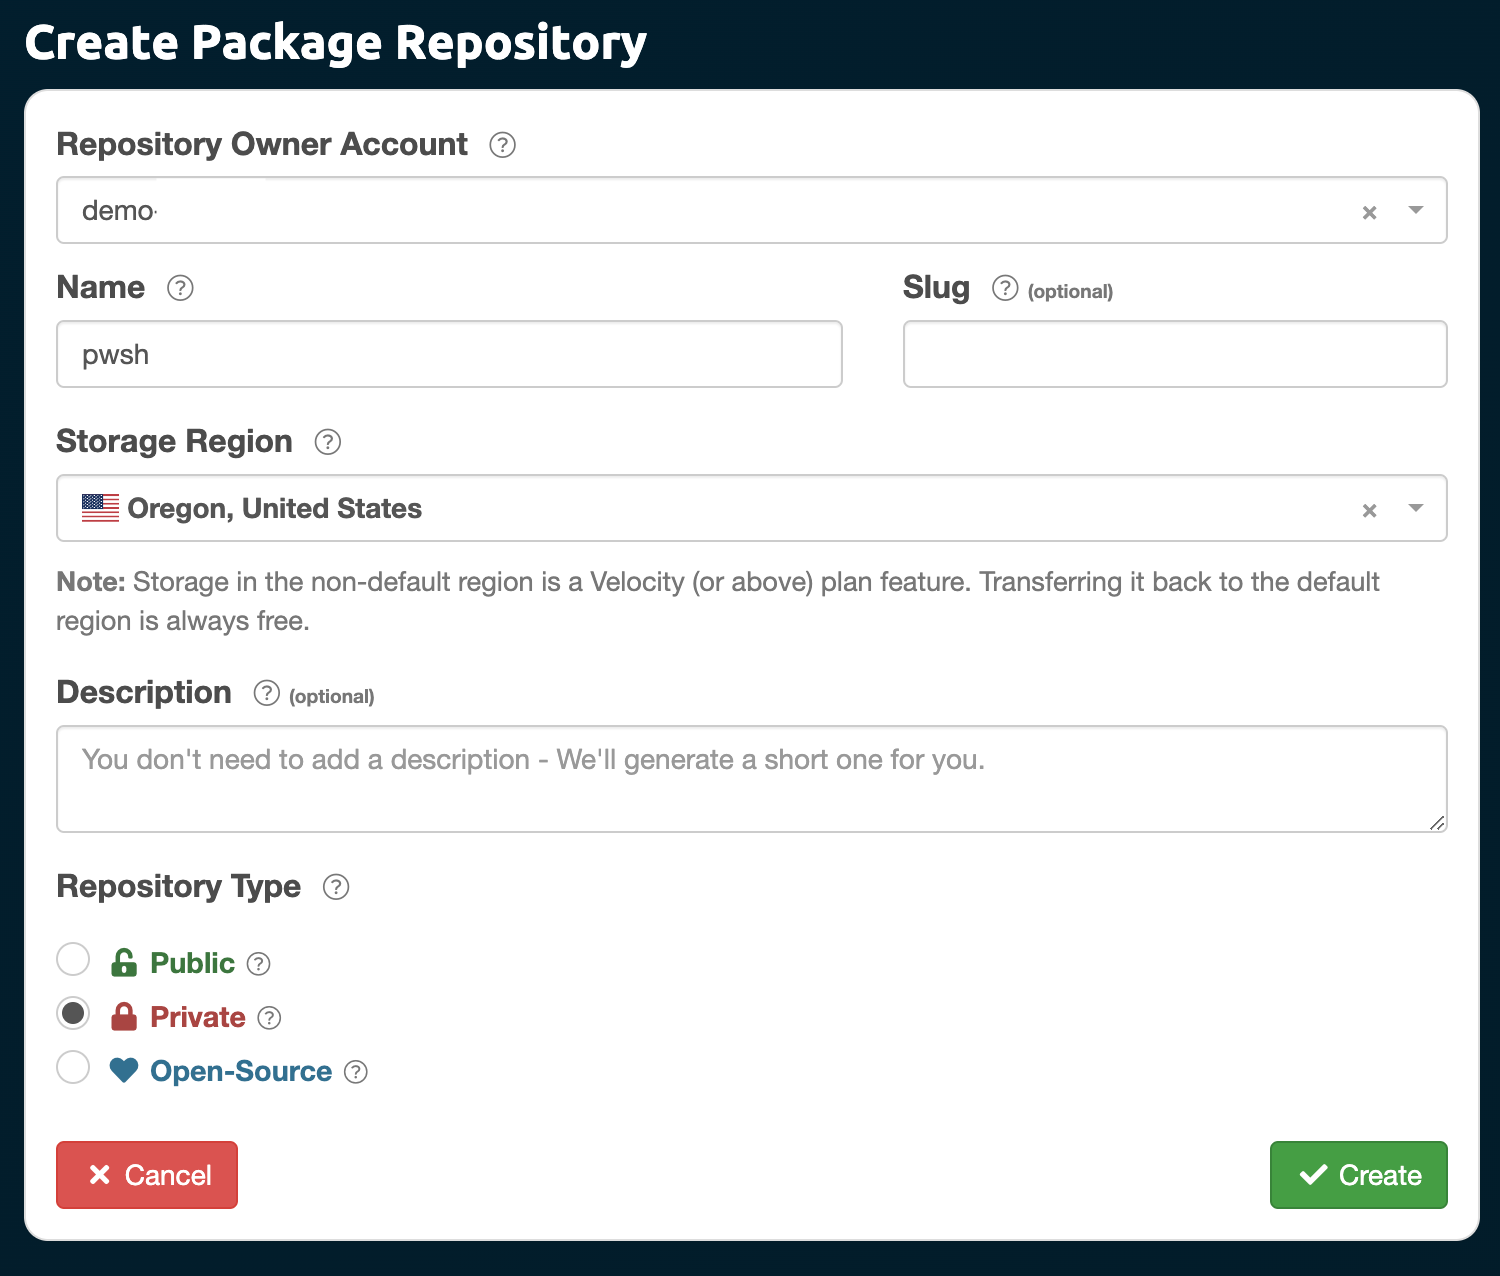
Fill in the fields above, and click “Create”. In a few seconds, your new Cloudsmith repo should be ready!
But wait, we did say earlier that we wanted to set up a NuGet repo specifically, didn’t we? Well, this is one of the many unique features of Cloudsmith. Think of this as your “Everything” repo. Our Multi-Format Repository feature allows you to store up to 28+ different package formats in the SAME repository! You can check out more information in our article: Modern Tech Stacks Need Multi-tenant Repositories, or just watch this short video:
A video on Cloudsmith's multi-format repositories.
Grab your API key
In order to authenticate to your new repo from your PowerShell console, we’ll need to grab your API key from the web portal.
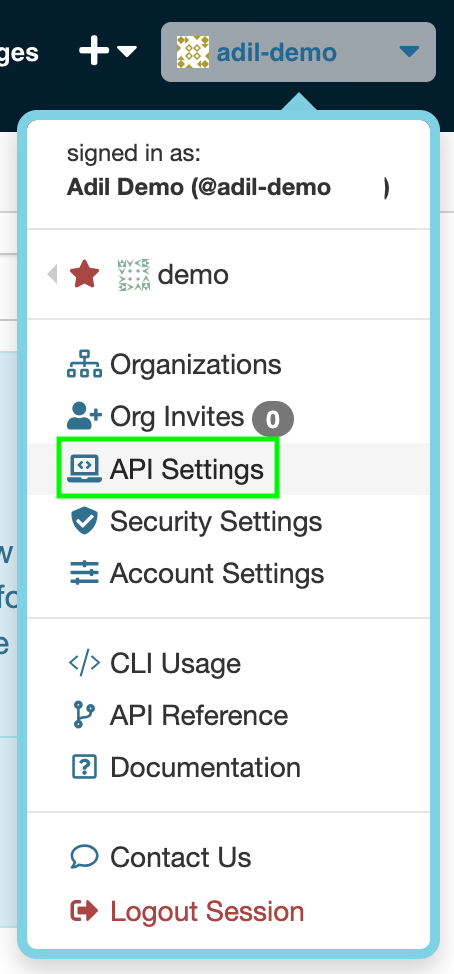
At the top right corner of the window, click on your username, and in the resulting drop-down menu, select “API Settings”.

You’ll now see your API key in the field above. Click on the paperclip icon to copy this to your clipboard, and save this key ins a secure location locally. You’ll need this for later steps.
How to configure the Cloudsmith repository in your local PowerShell console
Now, let’s switch to your PowerShell console to add your Cloudsmith repo locally.
Set up variables
We’ll need to define some variables first.
# Define your unique variables
$Key = 'YOUR-API-KEY’
$OrgName = 'YOUR-ORG'
$RepoName = 'YOUR-REPO-NAME'

# Build Repository Source URI
$RepoSource = "https://nuget.cloudsmith.io/$OrgName/$RepoName/v2/"

# We need a PSCredential to communicate with to repo
$Pass = ConvertTo-SecureString $Key -AsPlainText -Force
$Cred = New-Object -TypeName PSCredential('token',$Pass)
In the above code snippet, you will need to populate the `YOUR-API-KEY`, `YOUR-ORG`, and ‘YOUR-REPO-NAME` values accordingly. Next, we are building your unique URI for your Cloudsmith repo. Also of note, this URI is unique for NuGet. This is to ensure that Cloudsmith presents your local console with the correct metadata associated with a NuGet feed.
We are then creating your custom `PSCredential`, which includes your encrypted API key in order to authenticate against your private Cloudsmith repo.
Configure repository
We can now use the above repo URI and credential to finish configuring your Cloudsmith repo in your local console.
# Register the package source and repo locally
$SourceParams = @{
Name = $RepoName
Credential = $Cred
Location = $RepoSource
Trusted = $true
ProviderName = 'Nuget'
}
Register-PackageSource @SourceParams
$RepoParams = @{
Name = $RepoName
Credential = $Cred
SourceLocation = $RepoSource
PublishLocation = $RepoSource
InstallationPolicy = 'Trusted'
}
Register-PSRepository @RepoParams
Now, you can run the `Get-PSRepository` command to see your Cloudsmith repo has been configured properly.

Push a PowerShell Module up to the Cloudsmith repository
We will now push a module to our new Cloudsmith repo. For this example, we’ll save a sample module to our local directory first:
# Save a module locally
Save-Module 'Invoke-CommandAs' -Path .
Now, we’ll push it up to our Cloudsmith repo:
Publish-Module -Path ./Invoke-CommandAs -Repository $RepoName -NugetApiKey $KeyYou can now see the PowerShell module has made it into your Cloudsmith repo by browsing to your repository:


Installing the PowerShell Module from your Cloudsmith repository
In order to confirm that a working version of the `Invoke-CommandAs’ module has made it into your Cloudsmith repo, we can go ahead and install it from the repo to your local workstation:
Install-Module ‘Invoke-CommandAs’ -Repository $RepoName -Credential $Cred
You can confirm the module has been installed by running a `Get-Command` against it:
Get-Command -Module Invoke-CommandAs
Setting up a NuGet Upstream with Cloudsmith
As you’ve seen, the process of setting up a Cloudsmith repo and pushing and pulling PowerShell modules from it it quite simple. But what if I told you that you didn’t even need to populate your Cloudsmith repo with the modules you needed ahead of time?
This is where Cloudsmith Upstreams come in. You can set the PowerShell Gallery as an Upstream source for your Cloudsmith repo, and then you can simply begin installing any module available in the PowerShell Gallery from your Cloudsmith repo. As an additional bonus, these modules will automatically be cached in your Cloudsmith repo as well. This means that the next time the PowerShell Gallery goes down, you can continue using your Cloudsmith repo in your Production tasks and pipelines without missing a beat.
Set Up PowerShell Gallery as an Upstream
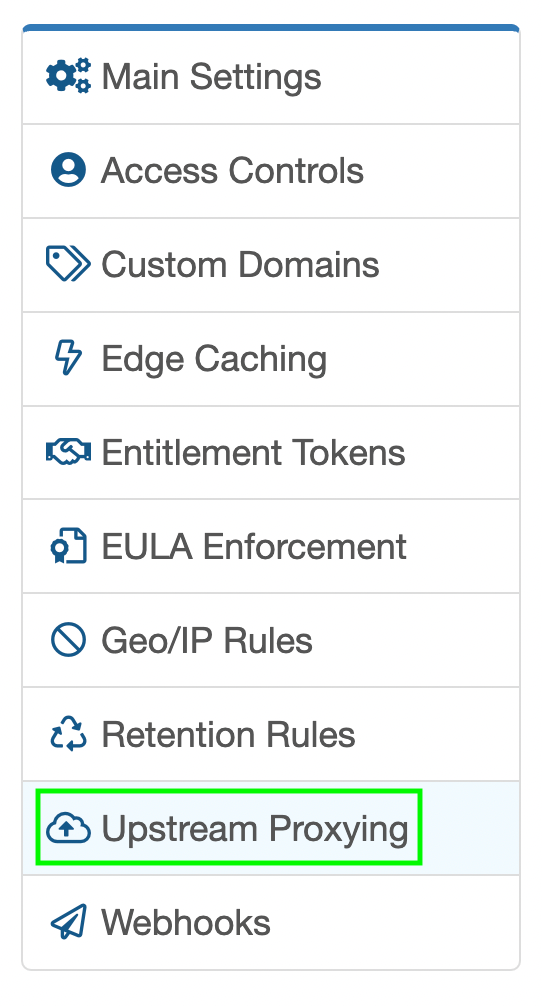
Browse to your repository, and near the bottom of your left sidebar, click on the link to “Upstream Proxying”:
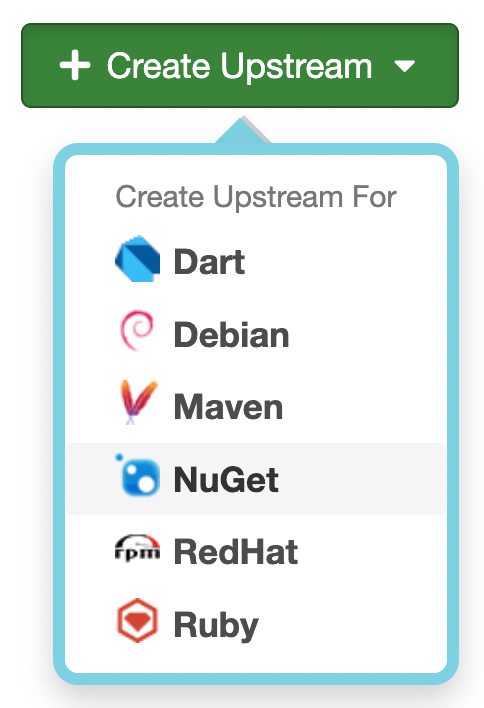
Now click on the “Create Upstream” button, and select “NuGet” in the drop-down menu:
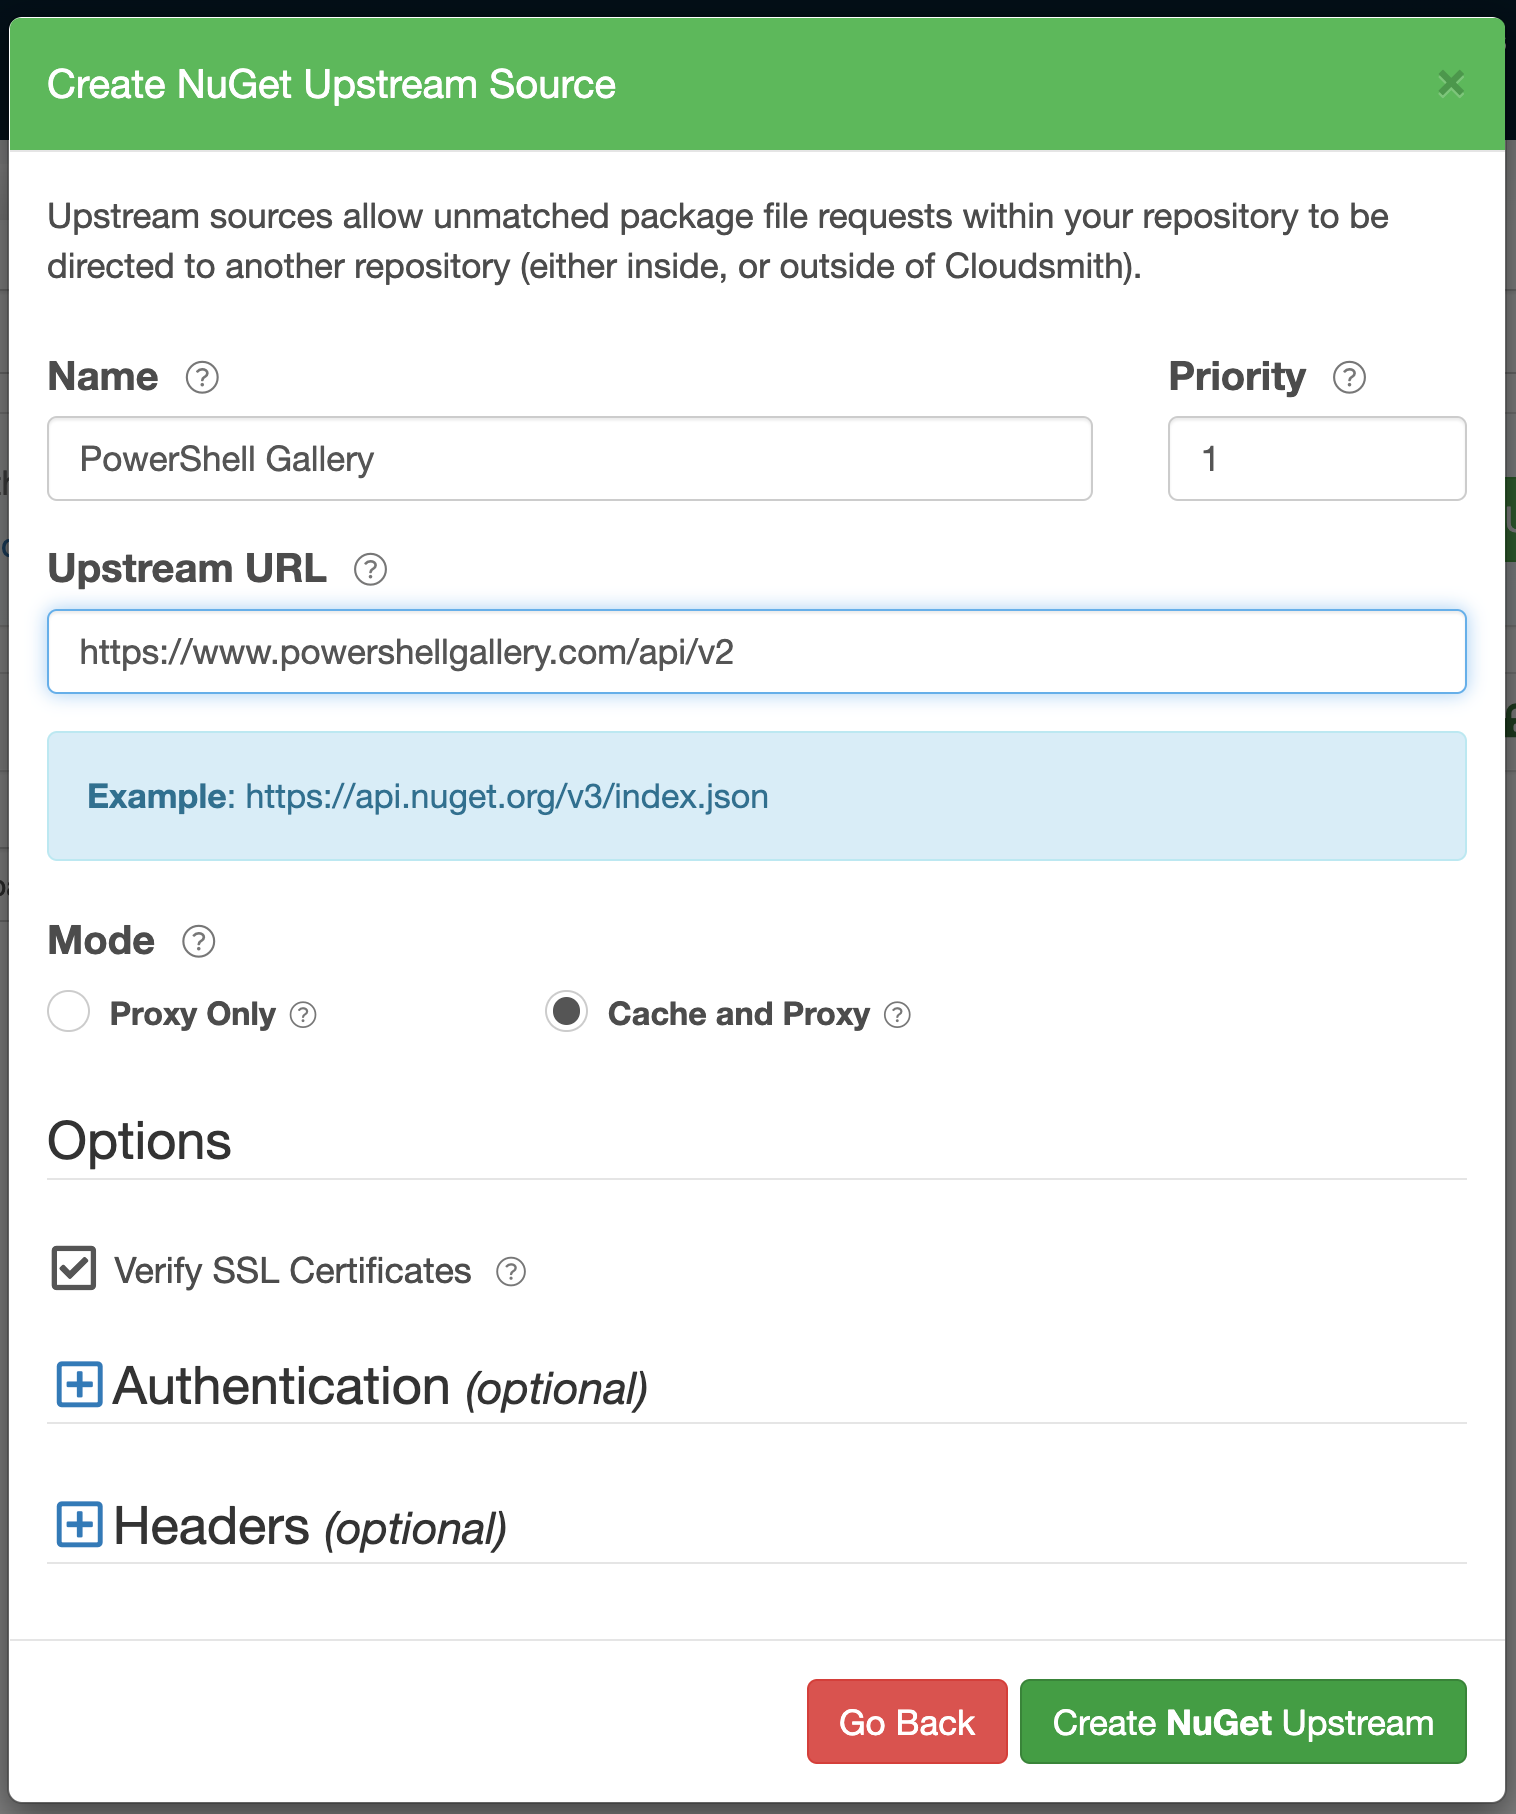
Fill in the fields as below, and be sure to leave the “Cache and Proxy” option selected; click “Create NuGet Upstream”:
Your Upstream is now configured, and you can begin installing PowerShell Gallery modules from your Cloudsmith repo, without the need to push them up first.
Let’s try this out by installing `PSWindowsUpdate`, a module we know isn’t in your Cloudsmith repo yet:
Install-Module ‘PSWindowsUpdate’ -Repository $RepoName -Credential $CredYou can confirm the module has been installed by running a `Get-Command` against it:
Get-Command -Module PSWindowsUpdateIn a few minutes, you’ll see that the `PSWindowsUpdate` module has also been cached in your Cloudsmith repo. The next time you, a colleague, or a pipeline task installs this module, it will come directly from the Cloudsmith repo, without needing the PowerShell Gallery at all.
Note: During your 14-day free trial, you’ll be able to use Upstreams without any limits. After the trial period, full-transparency, Upstreams are a paid feature if you’d like to continue using them.
Conclusion
So there you have it; not only can you have your own highly-available PowerShell module repository on Cloudsmith, but it’s relatively quick and easy to do so as well.
Again, if you are a visual learner, most of the material covered in this article was also presented at the PowerShell & DevOps Global Summit 2022; the video of this talk is here:
If you are curious about the NuGet package format, we’ve got you covered. We did a deep dive on NuGet here:
- What is NuGet
Or watch our to NuGet and beyond webinar below:
Hopefully, this article has shown you that hosting a NuGet repository for your PowerShell modules is no longer a slow and complex task. We look forward to seeing what you build with our platform, and please feel free to reach out with any questions.
And remember: Be Awesome, Automate Everything!
More articles

How to Analyze an SBOM
How to Generate and Host an SBOM

CD Foundation Announces Cloudsmith as a New Member

Pricing: Building A Better Cloudsmith
